Commision:Hold Tight – Reflections

The theme for the upcoming Hold Tight is Reflections. I thought my Infinity Box would be perfect to showcase for this as well as my box from the previous unit.

The Hold Tight collective will be joined by Steven Burch (Warner Bros, Dreamworks), animator for classic films such as Space Jam and The Iron Giant. In his 25 year career, Steven has worked under four Oscar-winning directors to animate some of the world’s most loved films and will be showcasing his new work at the event.

VJing live on the night will be EBH Luminaire, a creative company formed by Ela Brunel Hawes and Daniel Shutt, working with light, sound and image.
It combines mediums and technology to create tour visuals, light installations, photography and film. Their capabilities of using image and sound enables them nurture their own unique approach to art and today they collaborate with some of the most up and coming DJ’s and artists.
They will present a spectacular, live VJ set, featuring sets of specially-created visuals.

Jahday Ford from MSoA is bringing his 3 Dimensional Design expertise to the venue and will be transforming the DJ booth into a mystical nylon cave, with molten nylon spanning the decks. Hold Tight member, Dyllan Gunthner, is working on some incredible visual panels, which are set to literally transform the venue, ably assisted by visuals created for Hold Tight by Phil Rugo, fresh from supporting Soichi Terada in LA (USA).


Sneak preview to EBH Luminaire’s Hold Tight personalised visuals:


Infinity Box: Connecting the LEDs

Using pen and paper, I experimented with different configurations of the lights within the structure. In order to make sure the lights were positioned correctly within the frame and no “doubling up”. After many attempts of this using various coloured pens, I managed to narrow it down to being able to use two separate strips of LED Lights and both power packs coming out of the same end.

IMG_3704.jpgThe final obstacle I had left to tackle was that the LED lights would have to be cut in two separate places, and then both lights joined together with some sort of T Shape connector. I began to look for connectors but I had no experience in doing anything like this before and was not 100% certain that this was going to work, but with only 3 days left before the night I had no choice but to try.

IMG_3736.jpgIMG_3721.jpg

After hours of trying, I successfully managed to get all the lights to run around the box and in working order!! I was pleased with the outcome of the box and the way I had positioned the power packs were barely noticeable.

The only thing I was disappointed with was that due to the LED lights being strips and the light not covering 360 degrees, some of the tubes reflections in the mirror were not covered with light. This could be solved by wrapping the LED lights round a wire to cover all sides and then threading it through the tubes. But I did not currently have enough lights and time to re do this. However, I do think this adds to the boxes character as its not perfect, and isn’t so noticeable when you change the settings to different colours.

IMG_3757.jpgOverall I think the construction of the infinity box was completed to a professional standard. I had took in to consideration how to make it as strong as possible if I was wanting to hang this in the club as previously visualised, and also using screws instead of glue so I am able to get back inside the box to keep working on it and make improvements.

I have also bought steel plates which I will weld onto the corners of the box in the metal workshop at a later date so that I am able to hang the box from chains.


Infinity Box:Construction

A lot of thought went into the size of the wholes in the blocks, as they had to be big enough for the tubes to slot in. I had to drop down a drill size so that the blocks held them in place, and the width of the hole also had to be big enough for me to run the LED lights through the inside of the block and out the other connecting the sides together. This was a very tricky process.

The biggest obstacle I have met so far when constructing the box is the placement of the LED lights. I first thought I would be able to run the lights around the box until each side is covered with the strip light. However, due the tubes and holes only being slightly larger than the lights it self, there was no room to double up.

So instead, I am going to have to come up with a way I am able to run the lights around the box without going back on myself, whilst using the least amount of LED LIGHTS/Power packs as possible.

IMG_3673.jpg


IMG_3680.jpg

IMG_3706.jpg

Infinity Box: In the making

Once I had sketched up a plan of how I was going to construct the box and the measurements, I approached the woodwork shop, only to find out that I would have to do it exterior to the university, as they would not let me get inducted.

This is going to be a major set back for me, as I plan to showcase the box in less than two weeks time at Hold Tight.

I was able to take it to a wood workshop who thankfully were able to help me drill the required holes in the wooden blocks, as I did not have the appropriate drill heads or jigs needed to do myself at home. This was a very time consuming process as each 8 blocks needed to be drilled 4 times and I had to make sure I did not mix the left and right-sided blocks up. As I only had one spare block there was no room for error.

Luckily, the Perspex tubes slotted into the holes perfectly, and the frame started to take shape.

IMG_3606.jpg

thumb_IMG_3607_1024.jpg


thumb_IMG_3610_1024.jpg


Infinity Box:Development

Moving on from the last project, I feel that there is still a lot of development to be made on the construction of my infinity box. As l already know I want the box to light up, I have started to come up with ideas on how I will do this.

Unrealistically, I would not be able to have fluorescent tubes inside the box with this being too complicated. So I am going to look at other alternative lighting options instead.

After constructing my previous infinity boxes I found that making the two-way mirrors was a very lengthy process. However, as I want my box much bigger this time it would be far too expensive to buy.

I have decided I want to use LED lights within the box to keep the price down. I am going to purchase some Satin Acrylic tubes to run the LED lights through to give an alternative lighting effect.

I will use the laser cuter to create the box to make sure that the measurements are as accurate as possible. However, Instead of using glue as done previously, this time I will concentrate on producing a strong structural frame for the inside of the box to hold everything together. I plan to do this with 8 blocks of wood creating a cubic frame where the tubes will slot into and the LED lights will run through. Finally, I plan to drill the Perspex frame into the wood to hold the box together.

I will begin to sketch up some drawings on the box and work out exactly what measurements are needed. Gathering the correct measurements will play a crucial part in the construction of the box.

Reflecting So Far

Reflecting on the practice unit, I aim to get a lot done through out the remainder of Unit X.  to stay organised this time I will break down my weeks by making a time table to keep on track.

I plan to complete several commissions to expand my portfolio, and also build a website to present my work to future clients in a professional manner for once I have graduated.

I will also push myself into producing finished pieces to a high standard such as my Infinity Box, which can be presented within my chosen context. As well as creating a final light installation which will be shown at the Degree show in June.


Self Evaluation

Overall I have found that the practice unit has given me the potential to really explore, develop and push myself even further than imagined.

Incorporating a mixture of live and self directed briefs has given me the opportunity to create a fresh and exiting body of work whilst placing it within my chosen context.

My initial inspiration was acetate, lights, colour, transparency and texture, similar to those I have used throughout previous projects. However, throughout Bradford this quickly changed.

I began to look at Liam O’Callaghan and Jim Hodges use of reflections within light art. This was really inspiring and I took this upon myself as a challenge to work away from the vibrant body of work I was used too and instead, create a more organic-natural looking piece.

The end of this project ran smoothly into my outwards facing project, Hold Tight. Even though I felt like I hadn’t developed much sampling throughout this project, the experience that I gained from being part of a collective and organising a night definitely gave me a first hand experience of being an artist in the real world and problems that can be encountered.

I was pleased that my final boxes were commissioned by Hold Tight as well as the venue Texture, meaning that my hard work had finally paid off.

For the remainder of the practice unit, I started to explore light art. After doing in depth research and recently attending an exhibition in London by Ann Veronica Janssen who used a mixture of fluorescent lights and smoke to create a sensory experience. As well as being inspired by light artists such as James Turrell and Dan Flavin this encouraged me to buy my own fluorescent light sticks so that I was able to explore light, colour and perception first hand. However, this was not as easy as I thought it was going to be. Due to lack of space to be able to create such art pieces and the expense of the lights I decided it was best to think of a new approach to working with light art.

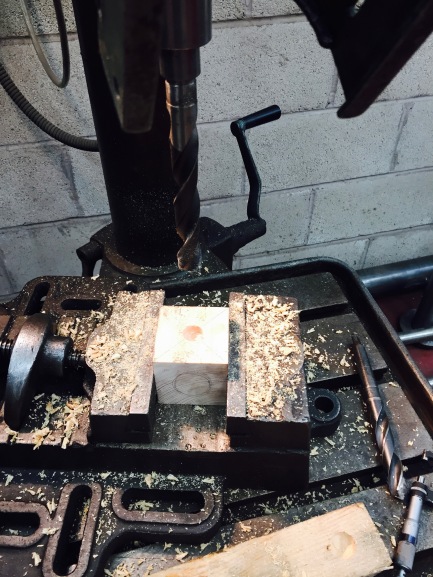
I had been doing a lot of research into infinity boxes. With my current self directed theme being Perception, Working to my strengths on the laser cutter, I started to build an infinity box. This was a lengthy process, instead of buying 2 way mirrors I decided to make them myself. Even though I was pleased with the outcome, next time i would just opt for purchasing them. Since making my last boxes, I thought about making them more durable for an event space environment. I did this by using Tensol, a Perspex bonding cement and using thicker perspex.

I was please with the development of my laser cut designs inspired by Regine Schaumann and Liz Winstanley. I loved the combination of the neon/fluorescent colours with the optical illusion inspired patterns.

Overall, I believe my main strength throughout the practice unit has  been achieving the reality of my desired context. I am going to continue the work of my infinity boxes through out  Unit X.  I believe these still have much more potential. I have also applied to a live brief for Kendal calling festival this summer where I could have the opportunity of receiving up to a 4,000 arts grant which would be hugely beneficial to my ongoing practice.

Kendal Calling

I have recently come across a Live Project for Kendal Calling festival that I believe would be perfect for my infinity boxes. The theme is Eden and to explore natural themes by day, “transforming into a night-time bacchanal of light and sound”. by day with the lights switched off the boxes would be minimalistic looking, however by night once the lights are switched on the infinite patterns given off from the 2 way mirrors would give off a totally different immersive experience

I also plan to apply for the arts grant which in this case is up to 4,000 pound. this would be highly beneficial to me for the remainder of my practice as one of the problems i encounter often is usually financial situations with the costs of my pieces being expensive.

kendal calling live brief

Developing The Infinity Box

Due to not being completely happy with the colours inside the infinity box. I decided to spray paint some of my laser cut pieces to see if it would make an improvement on the patterns shown within the box.

I was amazed with the difference. not only with the colour but the infinite pattern was so much clearer now.  I was really pleased with the development of the box now and believe this has soo much potential to be developed through to Unit X.INFIN BOX ATTEMPT 2.jpg

I then also went on to experimenting with filing the box with L.E.D lights. the lights are much more effective with emitting the infinity patterns and I didn’t want to delve into this process to much as I would like to explore this in greater detail within the next project.led light box.jpg


Realising My Ideas In Context:

Below are pictures of an Infinity Box installation by artist Domo Arigato, Mr. Reflecto, which taken place at Electric Forest festival in 2015. I believe this is the ideal context for where I wish to place my work.

I love the contrast between the multi purpose serving boxes which are just as amazing in the day time as they are at the night.

mr reflecto boxes electric forest.jpg

electric forest 2.jpgelectric forest.jpg

About the Installation – Artist Statement

Sherwood Forest is a creature of transformation. The spirit of The Forest has two distinct faces — one is revealed during the daytime, the other at night. A cloud of two-way mirror cubes suspended among the trees, “Domo Arigato, Mr. Reflecto” engages both faces of Sherwood Forest, undergoing its own transformation as day turns to night.

The cubes hover overhead in the daylight, reflecting the forest environment and its inhabitants. Unique mosaics of The Forest are created and recreated, framed by the Forest inhabitants’ changing positions beneath the cloud. As the sun sets, Domo awakens from hibernation, breathing in unison with the spirit of The Forest. LED strips illuminate the cubes from within, creating captivating spaces of visual infinity and virtual voids.

The cloud creates unique perspectival experiences, encouraging viewer participation, activating the cohesive forest organism. These unique perspectival moments converge as Domo’s cubes merge to form an anamorphic projection from Sherwood Court. Domo Arigato, Mr. Reflecto invites Forest dwellers to engage with the various forms of transformation that lie at the heart of the Electric Forest spirit.